


Please Login to comment on this post.

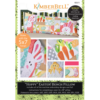 Kimberbell "Hoppy" Easter Bench Pillow
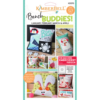 Kimberbell Bench Buddies CD: January, February, March, April (Machine Embroidery)
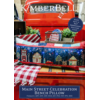 Kimberbell Main Street Celebration Bench Pillow, Machine Embroidery CD
 Hemingworth CutAway Medium Stabilizer 8"x 8" - 50 Sheets
 Kimberbell Deluxe Embroidery Scissors
Fringe with Lauri!
Lauri explains how machine embroidered fringe works and demonstrates three ways to do it with success. This FAQ includes video and text.
Lauri recommends:
Lauri demonstrates two types of fringe:
A: kind of a ragged, pattern of stitches with a tackdown line across one end. This results in a naturally looped fringe.
B: satin stitch, very dense and even, with a tackdown line across one end.
How to Cut the Fringe
After stitching, Lauri suggests trimming while your desigh is still in the hoop because the hoop will help you by holding your fabric taut.
On both types of fringe, you don't trim any of the tackdown. That's what holds it together.
On the back of your design, determine which areas will be cut. Some designs have lots of satins, so it can be helpful to mark the parts you are going to cut with a pen or marker. On the chick, you fringe only the wings. There are many satins, so use a water soluble pen to mark the stitches you are going to trim (just the longer white bobbin part). Lauri also shows how to use your bobbin color to help you know what to cut.
Trim just a few of the threads at a time by inserting your scissors (Lauri likes the Kimberbell Tweezers for the job) through just a few of the bobbin threads.
On the front side, run your tweezers across the front of the trimmed satins, and the loops will be released.
Lauri's tip: Some machines prefer either 60 or 90 weight bobbin thread. If you don't see bobbin stitching on the back of your work, you might have a machine that prefers the other weight of bobbin thread.
Fringing with water soluble bobbin
Water soluble bobbin can also be used, but only on the fringe parts (not the tackdown)-- Lauri demonstrates with Main Street Celebration. Corn husks in green are done with regular bobbin, because they tack down the fringe. The corn silks can be done with water soluble bobbin, and then dissolved.